How to Set Up Event Tracking in Google Tag Manager
In this blog, we’re going to explain How to Set Up Event Tracking in Google Tag Manager. Google defines an event as “user interactions with content other than page loads (pageviews). Downloads, link clicks, form submissions, and video plays are all examples of actions you might want to analyze as Events.” If you are an advertiser or business owner, chances are a large portion of the decisions you make regarding paid & organic marketing efforts are based on the user demographic information provided by tools. For example, 9.34% of our website traffic comes from Virginia, so a rational marketer who works at Simplified Impact may target users in Virginia more than somewhere like Missouri.
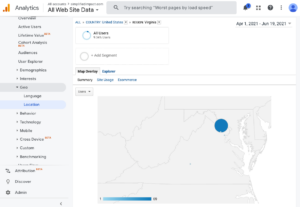
Simplified Impact users in Virginia
Geographical, Demographic, and other types of user information are becoming harder and harder to collect. The world is adopting data protection laws such as GDRP (General Data Protection Regulation) and CCPA (California Consumer Privacy Act.) As marketers, it’s up to us to adapt and find new ways of learning about our users and target audiences. Even Google has decided to stop using third party cookies within the Chrome browser by 2022.
More so than ever before, dialing in how you collect your first-party data will pay massive dividends in a future where privacy laws becoming increasingly strict.
Why Behavior & Event tracking is so valuable:
Any type of conversion begins with the user experience. From the beginning of their journey, what that consumer reads, clicks, and interacts with plays a pivotal role in whether or not they end up converting. If you’re just tracking your page views, you’re abandoning the data that spells out the changes that will undoubtedly improve your UI and increase your conversion rate.
Step 1:
Open Google Tag Manager and create a new tag for whichever analytics platform you’re using. We are currently using Universal Analytics.
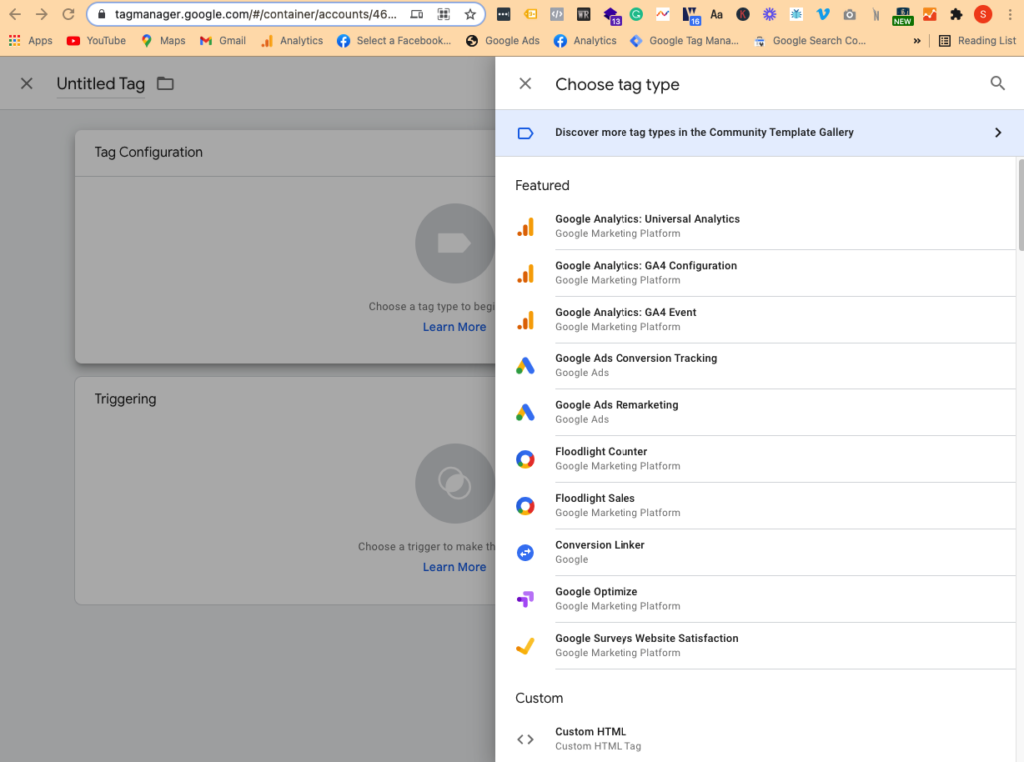
Step 2:
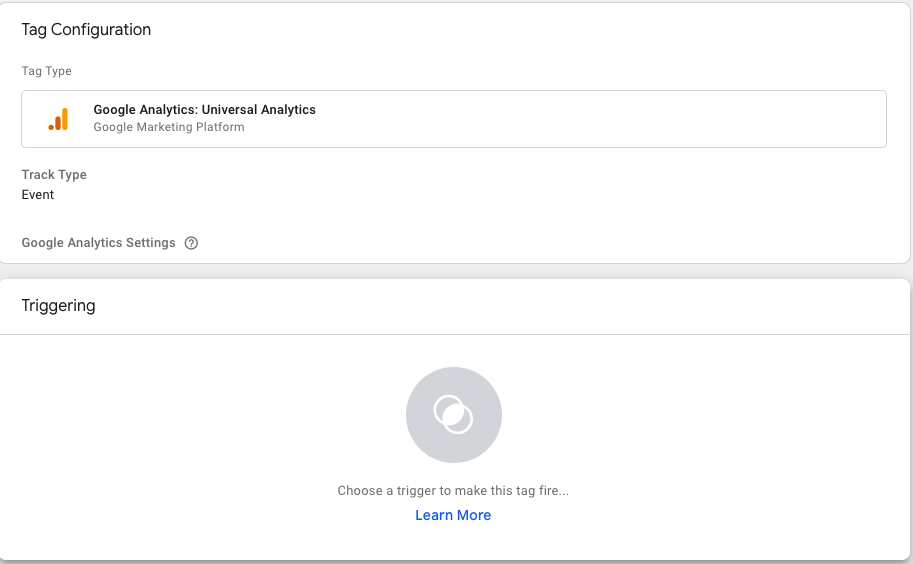
Select “Event” under track type
Step 3:
Customize your tracking parameters
From this point onward, you can select what events you want to track and how to label them within your Analytics property.
Let’s talk about our event tracking parameters and what they mean
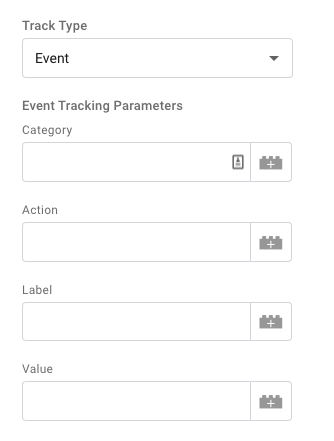
Category: There are going to be several things you want to track on your website. Think of the category as a place where similar events occur. For example: if you have multiple forms on your website (think onboarding for prospective clients, landing page forms, maybe even somewhere for future employees to schedule an interview)
Action: An action can either be active (clicking something, playing a video, submitting a form) or passive (reading for more than 10 seconds, scrolling to the bottom of a page, becoming idle.) Both types of actions provide valuable insight as to how a user behaves on a page.
Label: What you would like to call the event that you are tracking.
Value: a character equivalent to the action (Event completion = $12.95)
There’s also a field called Google Analytics settings- use that to put in your tracking ID of the analytics property these events will be tracked in. Tracking ID can be found by going to GA> Admin> Property Settings> Tracking ID.
Step 4:
Set the trigger that fires the tag
Triggers can be a bit overwhelming. Hopefully, this breakdown will make all of these much more understandable.
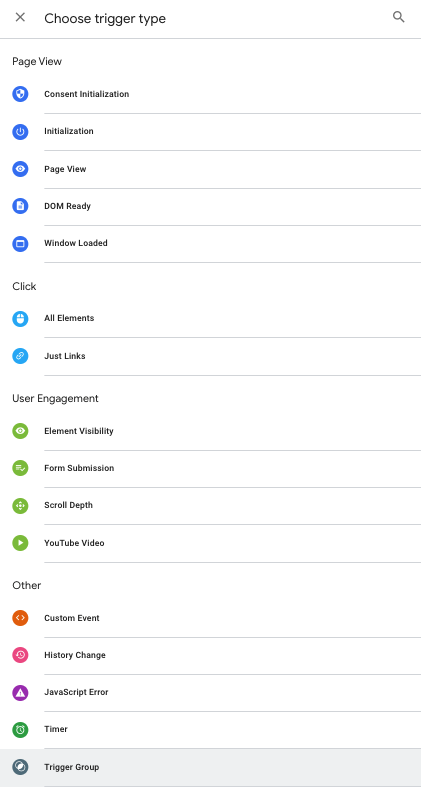
Page View: We touched briefly about the privacy laws that are providing users with additional data protection. Consent initialization is a trigger that tells your tracking whether or not that user would like to be tracked or not. This is only necessary if you’ve provided that option for your users via Google Analytics. We’re not going to explain the details of how a page loads, but just know that the order goes as follows: initialization, page view, DOM ready, window fully loaded.
If you want to track when each of these steps happens, you can do that with these triggers. This is super helpful if you want to figure out how to speed up your site since you can track the timing difference between each step of the page loading.
Clicks: Simply put- all elements= clicks on anything like links, images, buttons, emails, phone numbers. Just links= anything that is an HTML link
We recommend you be specific here since you don’t want to track all of the clicks on your site. The GA data will likely be too broad if you aren’t specific.
User Engagement: This should be pretty self-explanatory but reference the hyperlink the left if you’d like more info.
Other: Here’s where you can get complicated. This page by Google will explain when and how you should utilize custom HTML.
I recommend against trying to add too much custom HTML to tag manager since the tool is so comprehensive already, but one of the things that makes it so powerful is this ability to customize.
Step 5:
Save your tag and test your tracking with the Debug feature.
Once you’ve made your changes you want to test your tag tracking before you publish your changes to ensure everything is working properly. This is the step that beginner Tag Manager users often neglect yet it’s by far one of the best features.
Navigate to your top left corner and click “preview” and bring your debug window up. After that I like to put the debug next to the page I’m working on testing.
You can see below I clicked the “send” button to submit the form and the event “form submit” popped up on the left and triggered the contact us submission tag.

Step 6:
Publish your tag and find event tracking in your GA under behavior
Navigate to Behavior-> Events to check how your information is being tracked in your GA property.

I hope this explanation of how GTM can be used to track events helped you! While this wasn’t a step by step explanation of how to do x y or z, we thought it would be beneficial to break down exactly how the event tracking is set up so you could conceptualize it better.


